How to Change the Strings on an Electric Guitar

Written by: Matt Freeman
Updated:

To change the strings on your guitar, you’ll need the proper equipment: new strings, wire cutters, and some kind of guitar cleaner. Whether you’re a beginner or an expert player, restringing a guitar is something that you need to learn. More serious players may need to restring their guitars every month while regular players should get theirs restrung at least every 6-8 weeks.

While you can get your guitar restrung at a local store, this tends to cost a lot in service charges. Learning to do it yourself will grant you more control over the tone of your instrument. Furthermore, it will help you save money that you can reinvest in your music.

After weeks of constant use, your strings are bound to get gummy, grimy or rusty. They may even fall out of tune quickly. In such cases, it is best to change the string to ensure superior performance of the instrument.

While it may seem intimidating, restringing a guitar is actually quite easy. All it takes is a little practice and you’re good to go. We still recommend that you be careful as there can be a lot of tension on the strings which can cause them to snap.

Restringing a guitar basically consists of two parts: removing old strings and adding new ones. Here is our definitive guide on how to restring an electric guitar.

Related:

What You Need

  • Strings of the same gauge as the old ones.
  • Wire cutters.
  • String winder.
  • Pliers.
  • Tuning post.

An Important Pre-Requisite

Before you begin removing the strings, it is imperative that you get a good look at the condition of the guitar. This helps you determine how the guitar should look after restringing it. In fact, we recommend that you take a picture. This is especially important for beginners who get lost easily.
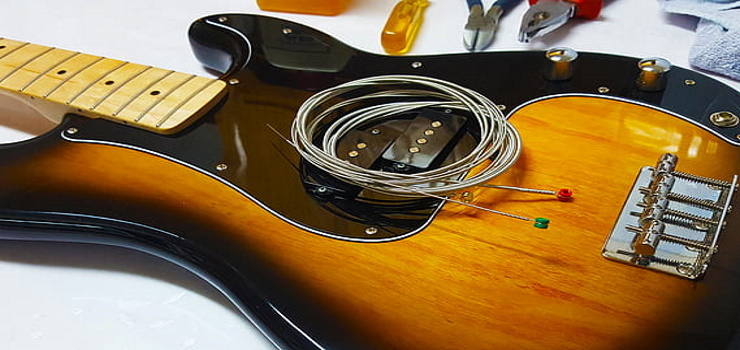
Removing Old Strings

changing the strings of an electric guitar

Before we begin, please note that you can change all the strings at once without it affecting the durability of the guitar. If you want to be extra careful, you can try changing them one at a time. This tends to be easier for beginners. 

  1. Loosen the strings by using a string winder. We recommend loosening them by about 3 to 4 winds.
  2. Next, you can either try loosening them by hand or cutting them off completely. Loosening grants, you an advantage as you can later reuse the old strings.
  3. If you choose to cut them, then do so around the 12th fret and remove all the strings.
  4. On the other hand, if you loosen them, you can try doing so initially with the string winder until you can easily unwind them by hand.
  5. Afterward, remove the strings from your guitar bridge. This can be done in two ways depending on the type of the bridge.
  6. If you have a regular bridge like the one in a string-through guitar, all you need to do is pull the strings from the back of the guitar. Remember not to yank the guitar strings. Otherwise, you can end up damaging your instrument.
  7. In case you have a wrap-around bridge, pull them from underneath the bridge.

Cleaning Up

  1. Use a soft linen cloth and start wiping the fretboard.
  2. Carefully wipe the fretboard to remove all dirt and grime from the neck of the guitar.
  3. Moreover, you can use lemon oil to add shine to the body of the instrument.

Adding New Strings

Note: You can try using a color code for the tuning pegs as they aren’t marked. Beginners can try removing and replacing them one at a time, which means they won’t have to keep track.

  1. Make sure you have plenty of space to work with. Lay the guitar flat on a surface.
  2. Turn the tuning post so that the hole faces in your direction.
  3. Generally, we recommend starting with the heaviest string which is marked as the 6th
  4. It is essential that you get the correct string in the correct tuning peg. Put the string through the bridge on the rear side of the guitar and pull it out from the front all the way until the ball stops it.
  5. Next, pull it up to the peg. Do not insert it into the peg right now.
  6. Generally, you need to give the string at least 1.5 inches of slack. Measure 1.5 inches above the peg and bend the string at that point at a right angle. The end should point towards the other tuning holes.
  7. Put the end of the string into the tuning peg until the crimped part.
  8. Crimp the other end of the string coming out from the peg.
  9. Make a knot with the end of the string by pulling it under and over the side string i.e. the side fed into the post. Pull the end taut towards the end portion of the guitar so that there is a knot between the tuning peg and the string.
  10. Wrap the guitar string around the peg and make neat coils.

Tuning the Strings

  1. Afterward, use a tuner to assign the appropriate pitches to your strings.
  2. An important part of this is holding the string down with your index finger.
  3. Do not pin it down. Instead, hold it gently with your finger.
  4. Turn your tuner in a clockwise direction ensuring that the string is winding uniformly.

In addition, we highly recommend using an electronic tuner, especially for beginners. This helps them get familiar with the tuning process and also ensures that their strings play the correct notes.

Next, all you have to do is repeat these steps for all the strings and use wire cutters to remove the excess string.

Parting Notes

All in all, restringing a guitar can be easy once you get familiar with it. At the same time, we recommend that you exercise precaution as it can end up damaging your instrument and hurting you. In the end, it will save you money and will ensure top-notch performance of the instrument.

Written By:
Matt is a professional guitar player in a rock band and a private instructor on the side. He actively writes for MSpot sharing his insightful knowledge of the guitar industry.

Copyright © 2024 MSpot. All rights reserved. Privacy Policy & Cookie Disclaimer.

mspot.com is a participant in the Amazon Services LLC Associates Program, an affiliate advertising program designed to provide a means for sites to earn advertising fees by advertising and linking to Amazon.com. As an Amazon Associate, we earn from qualifying purchases.